Removing an Artist from your Roster
Removing an Artist from Your Roster
Learn how to permanently remove an artist and their associated data from your organization.
⚠️ Important Warning: Deleting an artist is permanent and irreversible. All associated data (events, schedules, contacts, files, etc.) will be permanently lost. Make sure you won't need this information before proceeding.
Before You Delete
Consider these alternatives:
- Archive inactive artists instead of deleting them
- Export important data you might need later
- Download reports or save key information
Step-by-Step Removal Process
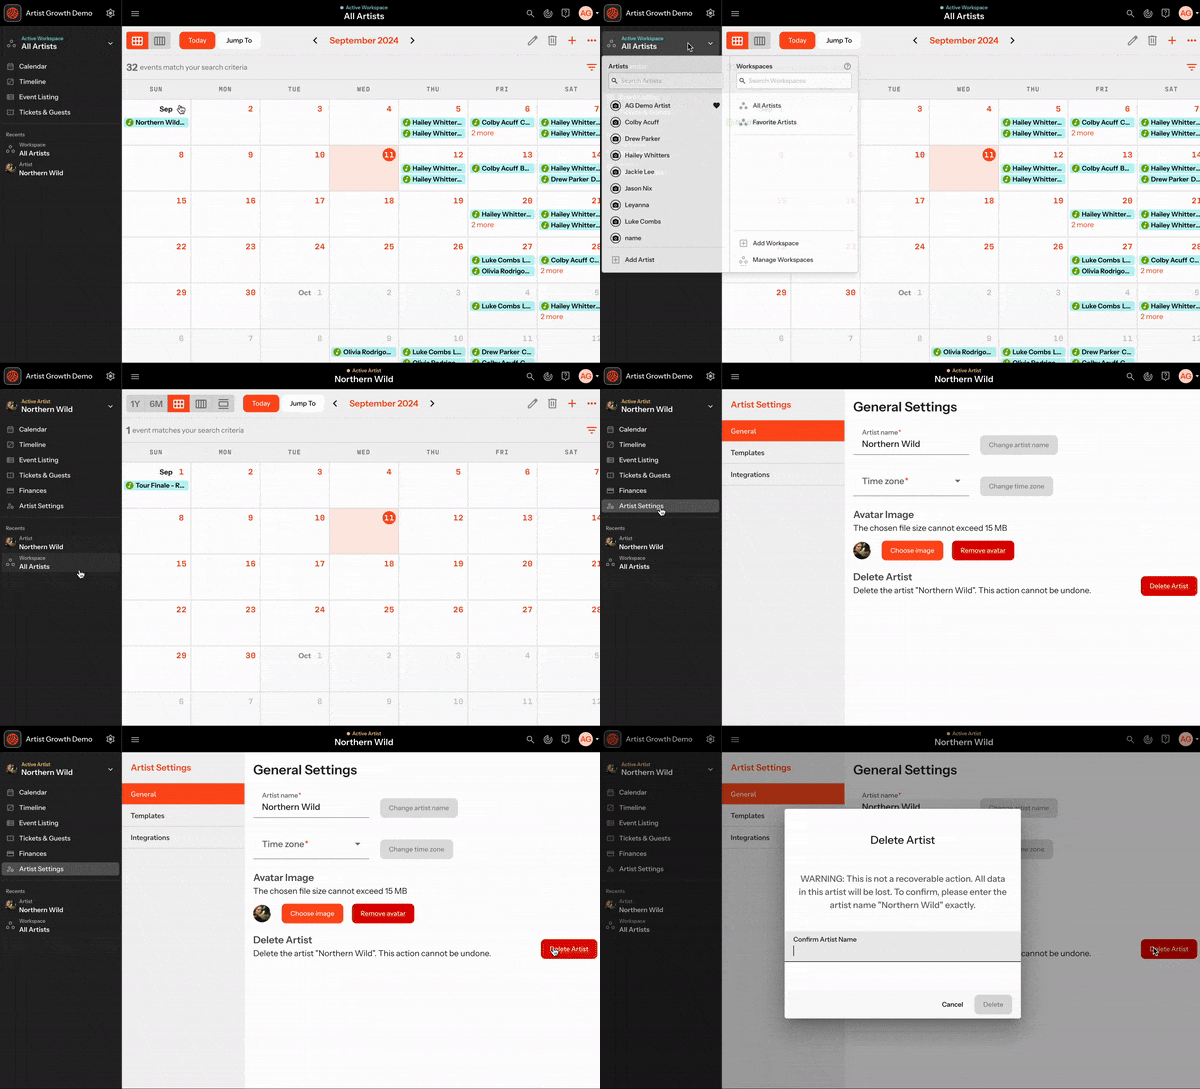
Step 1: Access Artist Settings
- Navigate to your Roster
- Find the artist you want to remove
- Click on their name
- Select Artist Settings from the left navigation bar
Step 2: Locate Delete Option
- You'll see the General Artist Settings page
- Look for the Delete Artist Button (usually located near the artist name and timezone settings)
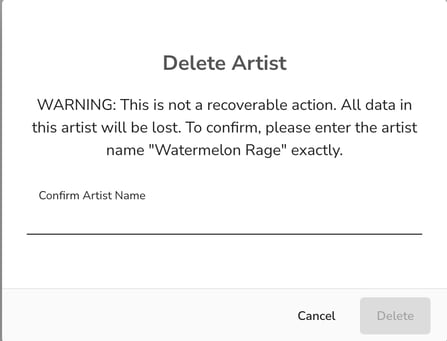
Step 3: Confirm Deletion
- Click the Delete Artist Button
- A confirmation prompt will appear
- Type the artist's exact name to confirm
- Click Delete to finalize the removal
What Happens After Deletion
Once you complete the deletion process:
- The artist will be immediately removed from your roster
- All associated data will be permanently deleted, including:
- Events and schedules
- Contacts and guest lists
- Files and documents
- Historical activity and reports
- You will lose all access to this information
This action cannot be undone

Did this answer your question?😞😐😃